Back in January of this year (2019), QRPGuys announced a new kit: the EZ-WSPR Pi, based on a public-domain circuit by HA7DCD. TAPR also has a fully-assembled surface-mount version. Both are “simply” a combo LPF (low-pass filter) and BPF (band-pass filter) with a buffer (and amplifier) for the clock output of the Raspberry Pi, which is what creates the WSPR signal.
A Raspberry Pi Radio?
Yeah, you read that right. The Raspberry Pi creates the signal. What are radio waves, after all, but oscillations at certain frequencies? Computers (like the Raspberry Pi) are capable of creating these. And a brilliant person named James Peroulas took advantage of this by creating programs for the Raspberry Pi that can generate CW and WSPR signals. The WSPR program is called “Wsprry Pi.” Now, it’d be wrong to say it was a solo effort—take a look at the “credits” section in the readme text on that GitHub page. He based his work on many other previous efforts for similar things (such as PiFM).
Frequency Calibration
Besides just generating a signal, part of James’ magic sauce is frequency calibration. This is critical to generating a signal in the multi-megahertz range from a device that wasn’t intended to be a transmitter. I did some light research on how this works and it turns out (at least on Linux-like systems) that the time system actually provides a PPM (parts per million) correction factor for the system. It doesn’t just set the clock to a certain time of day down to the second—it actually provides the system with a value that can allow it to more accurately track time based on local error factors! Cleverly, the Wsprry Pi program takes advantage of this to correct the frequency being output on our GPIO pin. After a few correction cycles, the Pi will actually get pretty consistent frequency stability.
Clean up that signal!
So the Raspberry Pi can transmit a signal just by outputting a square wave at certain frequencies on one of its pins—great! Just one problem: it’s a square wave. I won’t go into detail on this, but a square wave has *lots* of harmonics (other frequencies) as the result of its shape. You can read more about it on Wikipedia and other places. If you want to transmit a nice, clean sine wave at (mostly) one frequency, these harmonics have to be filtered out. This is typically done with an LPF (low-pass filter). In addition to these harmonics, there’s some broadband noise, too. Check out this detailed paper by HA7DCD on the issues with Raspberry Pi signal generation. This is where having a combo LPF and BPF unit comes in. Hence, the WSPR-Pi from TAPR and the EZ-WSPR Pi from QRPGuys. These clean up the signal and provide a decent amount of amplification, bringing the power up to approximately 20dBm, or 100mW.
WSPRLite
It should be noted, for those that want a great out-of-the-box solution, along with some really great online software, the SOTABeams WSPRLite could be a great option, albeit at a higher cost. If you already have a Raspberry Pi (or five), turning it into a transmitter can be a lower-cost option.
Build
My first purchase
I bought my first EZ-WSPR as soon as it was announced in late January. I had it built by mid-February. That isn’t to say the build takes a long time, it’s just that it takes me a while to get to these things sometimes.
This first kit was missing one of the capacitors, so I wrote Doug at QRPGuys. He helped me get it sorted out right away.
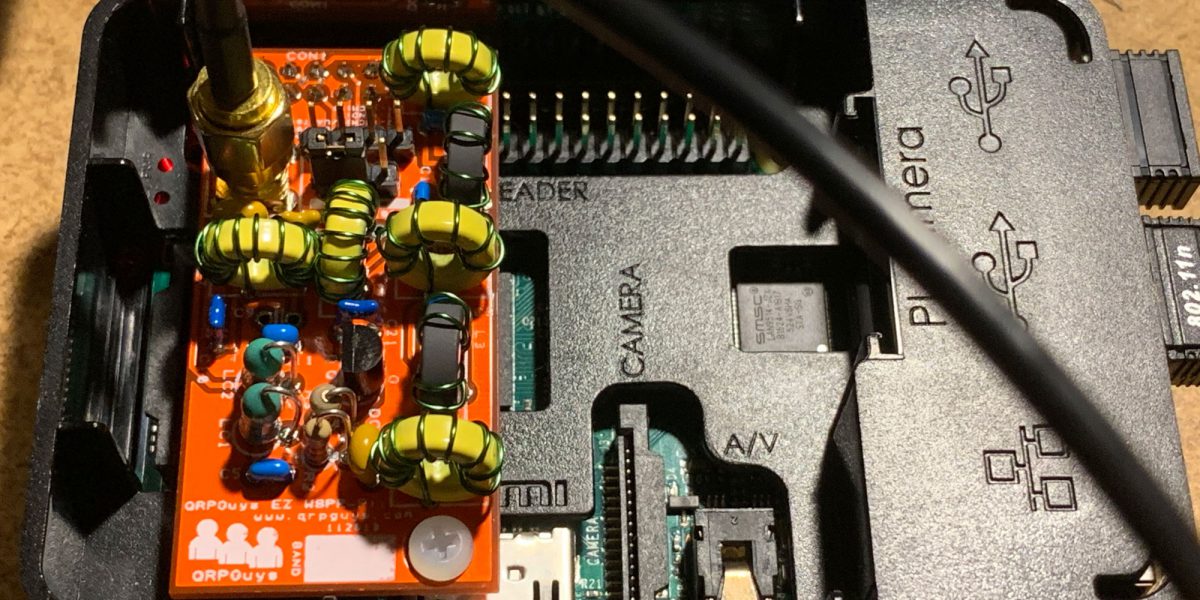
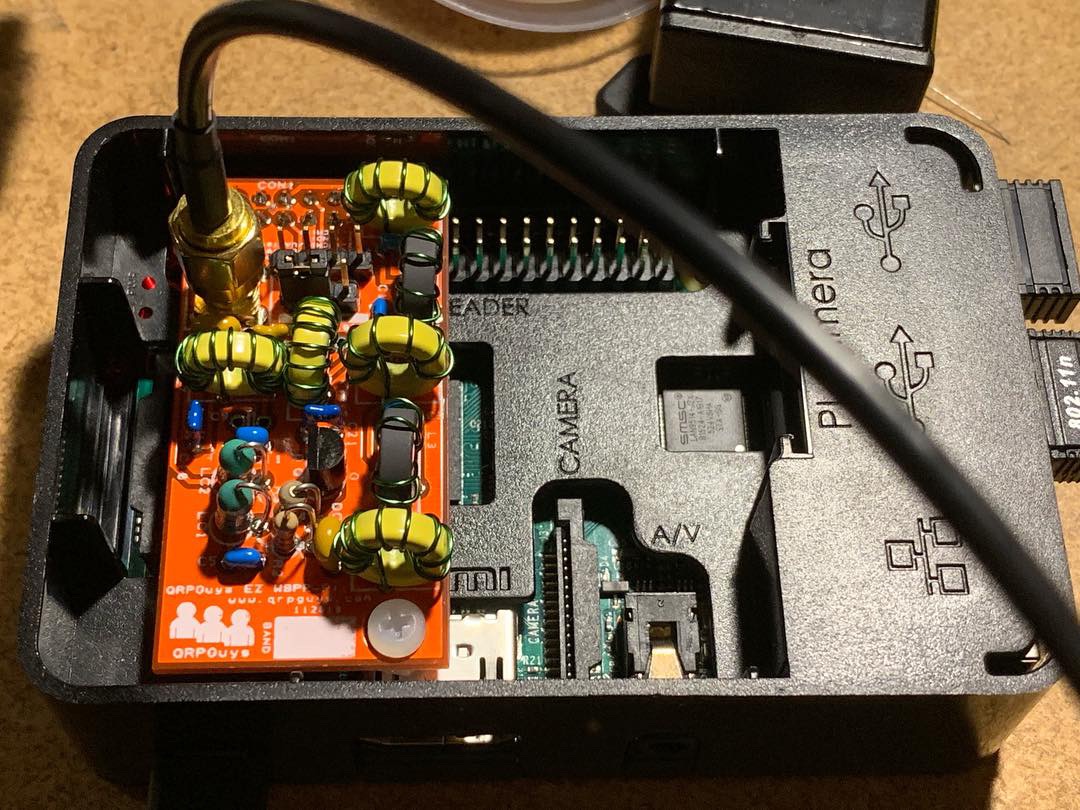
Toroid winding
Now, some people dislike winding toroids. I happen to enjoy it. And if you want an easy introduction into the world of toroid-winding, this is a great kit for it! There are seven easy-to-wind toroids in this kit. Even though I enjoy winding toroids, it is a little bit tedious, so I like to get them all done at once, as the first step of the project. The instructions have it toward the end as you’re installing them, but I usually do it first. There are various tips and tricks you can find out there on the web (and YouTube), but the key thing to remember is that the number of turns is counted by the number of times the wire passes through the inside of the core. That’s it. Wind the wire as shown in the instructions and you’ll be OK!
It’s pretty easy build.
This kit doesn’t have a lot of parts, so pay attention to which parts you’re putting where, apply your basic soldering skills and you’re all set. I will provide a couple of tips, though:
Magnet wire: In the instructions, QRPGuys says to always tin the wire before soldering in place, and that the magnet wire is of the “Thermaleze©” type, so doesn’t require scraping. Based on my experience, this doesn’t mean you should use your soldering iron to melt the insulation off—it’ll gunk up your soldering iron tip and make soldering difficult. I use a mini-torch or lighter to carefully burn off the coating, taking care to avoid adjacent windings or heat the toroid itself. Then I’ll use fine-grit sandpaper to remove any residual coating. This leaves nice, mostly-clean copper for you to tin and solder into the circuit board.
Headers: There are three headers to install on this kit. Two are single-row male headers (pins sticking out of both sides of the plastic) and one is a double-row female header (two rows of pins sticking out one side). These (especially the single-row ones) can be tricky to get straight. On the single-row headers, solder one pin (careful not to apply heat for too long!). Then, if it’s not quite flush and/or straight, re-heat that connection and move it into a flush/straight position. Then solder the remaining pins. For the double-row header, things are a bit easier—the main issue being to make sure it’s flush. I usually solder two corner connections, then re-heat these as necessary to reposition the header.
Testing
Installing the Wsprry Pi software was easy—I just followed the directions on the Github page. I ran into no issues.
Running the program (at least in my case) did require root privileges, which I’m not sure is normal. There’s probably a way to configure the Raspberry Pi so this isn’t a requirement, but I didn’t bother figuring that out.
I plugged the completed project into the GPIO header on the Raspberry Pi (the main one I use for my ham shack—I haven’t gotten around to writing about that yet). Then, I connected it up to a dummy load and did some basic power measurements. I calculated roughly 80mW output. Great!
Putting it on the air
I hooked this up to my primary home antenna—a 40-meter full-wave horizontal loop, in a delta/triangular configuration about 20 feet up from the ground. This antenna also works quite well on other bands, including the 20-meter band this device is designed for. This is a pretty good antenna to hook up to for WSPR tests—definitely a big advantage.

After a few 2-minute WSPR transmission cycles, I saw great results! On the map above, you can see that it reached most of the United States in that brief time.
I’ve run longer sessions since then, occasionally reaching far-off places like Australia and Antarctica. So it definitely puts out enough signal to be useful for antenna testing!
Let’s build another!
I recently ordered and built another one of these and set up another Raspberry Pi to transmit with it. This build, again, took me way too long because I only spent a few minutes at a time. I also soldered a capacitor in the wrong position and had to desolder and reinstall it before proceeding. Oops! In the end, though, this second one performs identically to the first—including the measured power out. Which is a good thing, because I plan on using these to compare antennas!
What’s next?
I’m going to do at least one antenna test. I was inspired by much online discussion about the pros and cons of a couple of different antennas and decided I needed to buy a second EZ-WSPR so I could test them side-by-side at the same time.
The two antennas in question?
- A coax-fed linked dipole (I’ll use my SOTABeams version)
- A speaker-wire antenna—feed line and radiator all speaker wire, a la Jerry KG6HQD
Stay tuned!
I’ll set both of these up in a nearby park, with similar configurations. I’ll run WSPR for a set amount of time, then compare the results in terms of number of reports and signal strength.
I’ll write up the results of the tests in an upcoming post.
73!