Even though I’m in the middle of figuring out the build of a shortened end-fed half-wave antenna, an improvement on my current EFHW setup, I’d had my eyes on various vertical antenna solutions for a while, even though they’re not as efficient as a full-size antenna. Recently, QRPGuys released a new vertical antenna kit for portable ops, and I couldn’t resist trying it out.
I ended up getting the kit straight from Doug Hendricks (KI6DS) himself, so I got a prototype very similar to the current version being sold. This is a truly impressive kit, especially considering the price ($15 USD at time of writing). I’m writing this post well after having acquired and built the kit, so there’s another post (SOTA activation of Black Mountain) where I used this antenna.
The Kit
As mentioned on the QRPGuys site, the kit is based off of a design by Joe Everhart (N2CX)—an antenna setup he used extensively during the 2017 National Parks on the Air program. His full article can be read on the July 2017 issue of QRP Quarterly. The QRPGuys turned this into a kit built with switched switched toroids for base loading of the antenna on the 30 and 40-meter bands. All of the QRPGuys kits elegantly employ the circuit boards themselves as a structural part of the kit, keeping cost down and simplicity up. This kit, combined with the “squid pole” and antenna wire I already have, makes a quick and inexpensive vertical antenna for summits and other areas where I might not have enough room to set up my full 65-foot (or whatever length it ended up at) end-fed wire.
The Build
Overall, I found the kit to be a very straightforward build. I’ve heard some people say they’re afraid of winding toroids. Well, once you do one or two of them, you won’t be anymore! What can I say? They’re just not that difficult. This kit would probably be a really good introduction for winding them, since it’s just a straight “wind this number of turns and you’re done” kind of thing.
I followed the instructions and had the kit together with less than an hour of total work. I wound the toroids the night I got it, keeping track of the number of turns using a calculator (hitting the “equals” key with each turn). I then verified the number of turns with a close-up shot on my camera (the instructions give this as a tip).

Winding the 40m inductor
Next, I soldered all of the parts on, leaving some of the toroid wire sticking out, just in case I had to add turns. I then cut all of the recommended lengths of wire from my roll of SOTABeams lightweight wire. I wound all of this onto the board (it’s shaped to be the wire winder!) and weighed it.

109 grams – not bad! That’s just shy of 4oz in Freedom Units.
Tuning and Tweaking
The next day, I set up the antenna in my back yard using my squid pole strapped to a chair. I realized I’d have to come up with a better system for setting it up—perhaps an old tripod modified to accept the fishing pole, or something else. I ended up coming up with something even better—I’ll get to that in a bit.
This antenna can probably be tuned without an antenna analyzer, by just adjusting the length of the wire and checking the SWR at various frequencies (if you have a transmitter with an SWR meter). But since I have a very basic antenna analyzer (the Ham Radio Workbench K6BEZ kit), I would be using it.
With a bit of trimming, I got the wire to resonate well on 20 meters. This is the first thing you do, since it’s just a straight quarter-wave vertical for this band.

Looking good for 20 meters!
After checking it on the analyzer, I plugged in the FT-817 and made sure it was good, by doing a few transmissions at the bottom, top, and middle of the band. It had great SWR for most of the band! Let’s see how it does on the other bands.
Going back to the analyzer, I checked 30 meters.

Looking good on 30 meters!
Again, I tested it out with the FT-817 as well. Totally good for the entire (small) 30 meter band.
Then, I went to 40 meters.

Uh-oh! Resonant frequency too low!
Here’s where I ran into my only problem with the build. The resonant frequency was just way too low on 40 meters. Hoping my analyzer was incorrect, or that maybe some of the dip in the graph covered a usable part of the band, I hooked it up to the FT-817 again. Nope! Super high SWR reading for most of the 40 meter band, but slightly better at the very bottom.
I started by messing with the spacing of the turns on the toroid. First, I meticulously spaced them evenly – I figured it would be good to start with something orderly. This made almost no difference to the resonant frequency. Next, I read somewhere that inductance goes up if squeezing them together and inductance goes down if spreading them apart. So I spread them apart. The frequency went up a little bit. I spread them more and it went up a tiny bit more. I never did spread them as far as they’d go, since it didn’t seem to be making enough of a difference.
Instead, I went ahead and desoldered the inductor and took one of the turns out, then soldered it back in. The frequency came up some, but not enough. I ended up doing this two more times, but I was then smart enough to just desolder one side of it—the side I was taking turns out of. The instructions stated 38 turns for L2 (the 40m inductor), but I ended up at 35.

That’s most of the 40 meter band
Again plugging into the FT-817, I verified we were good to go. I did some test calls with CW and got some reports on RBN (Reverse Beacon Network). Great! I couldn’t wait to actually test it.
New Guying System
I wanted to come up with a simple, reliable and ideally, lightweight system to set up this antenna. I didn’t want to rely on strapping the pole to things, or hosting the wire into a tree (although those things could work). I wanted this to be my quick-deploy no-fuss antenna system.
I took an old tripod and removed the center column from it, then drilled out the center holes to fit my 17-foot “squid pole.” This was OK, but I needed to do something to reinforce the tripod legs. That’s still a work in progress.
For my wire antennas, I use the lids from Talenti gelato containers to make end insulators and other small plastic bits. I got the idea that one of these complete lids might actually make a good guying collar for my fishing pole, rather than having to order one somewhere. I was right! I drilled a 3/4″ hole in in the middle of the lid, then small holes in the sides for three guying cords. This sits about 5 feet up from the bottom of the pole and locks into place on top of that section of pole. The three guy lines are staked into the ground (or tied to objects) and adjusted for a nice vertical antenna mast.

Talenti-lid guying collar

Mast set up in my back yard
A key requirement for me is that all of this stuff be lightweight and compact (without getting too crazy about it). With the guying system added to the vertical antenna kit, the total weight comes in at 198 grams. If I add in some RG-174 (you gotta have coax to hook it up!), the weight goes up a bit. But this is still pretty close to the weight of my end-fed half-wave kit (about 240g).
Testing
The next week, I wanted to test the antenna out a bit. I didn’t have time to put together any rigorous tests. No A/B testing here with multiple antennas.
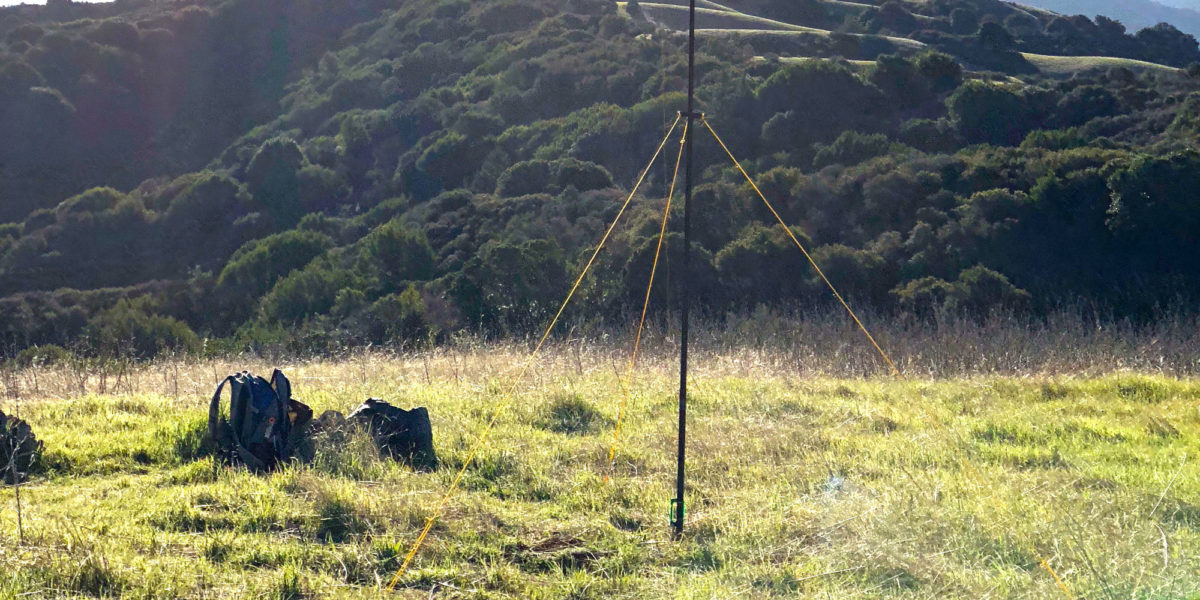
I set up the antenna using my new guying system, with the board strapped to the bottom of my pole, and the radials laid out on the grass as straight as I could get them. On my pole, I actually removed the very top section and just ran the wire all the way to the top and down into the top tube a couple inches—a great way to secure the wire.

Wire going into top of the pole. It holds well!
With limited time, I just ran WSPR for a little while, on each of the three bands.

Makeshift WSPR setup
Even in the late afternoon, I was able to get some good reports on WSPR. All three bands (20m, 30m, 40m) got some pretty far-away reports, around 2400-2600 miles. That was with just 2 transmissions on each band. There were even some transmissions with positive (above noise floor) reports.
It seemed to do a pretty good job receiving, as well. Perhaps at some point, I’ll run a longer, more comprehensive test, perhaps with multiple antennas placed far enough apart they won’t affect each other. For now, I know I’ve got a solid-performing antenna here. I knew it was ready for my SOTA activation the next day, and I felt comfortable bringing it as my sole antenna (though I did end up bringing a backup anyway).
The next morning, I brought it up to Black Mountain and tested it in the field. I was quite pleased with the results!
Final Thoughts
I’ve got a couple of improvements in mind. For example, I might solder some “bullet connectors” in place of the screw connectors, to simplify setup and save a bit of weight.
I also want to get this up onto some other summits, perhaps with steeper drop-offs and/or rocky terrain, to see how the SWR and performance hold up.
This antenna will definitely be part of my kit for any and all portable operations going forward. It’ll compete with my EFHW in terms of ease of setup and amount of space required. I’m looking forward to the many contacts I’ll make with it.