How do you quickly, easily, and inexpensively get your antenna wire up in the air? This is one of the first things I wanted to solve when I first set out to do portable operations.
There were several options that were easy to find, but didn’t quite fully fit what I had in mind — most notably from SOTABeams. They have some great masts, but the weight and cost weren’t quite in the range I had in mind.
SOTA Mast Solution Found
At some point I stumbled across Peter VK3YE’s videos on YouTube. He has at least one video on using inexpensive telescoping fishing poles as masts. Then I found out that it’s something a lot of people have done. After a good deal of searching, I found what I wanted on eBay. I think I’ve mentioned before, I usually search for “7.2m FRP Pole” on eBay and come up with several options.
Here’s a good thing to know: the “7.2m” isn’t the actual length of the pole when fully extended. It’s most likely the length of all the individual pieces combined, if they weren’t fit into each other. This pole has become my standard mast for all of my SOTA activations, if I’m not throwing the antenna wire over a tree or some other arrangement. I’ve even lost or destroyed at least 2 or 3 of these, and it’s not that big of a deal since their price ranges from $9-12 USD. If you’re more into making your purchases on Amazon, they cost more but they are available.
More recently, thanks to a tip from Amy AG7GP, I found a “9m” version of the pole on eBay. The collapsed length is the same, but it’s a bigger diameter, in order to accommodate more sections for the overall additional width. With the top section removed, it’s about 21 feet or 6.4 meters when deployed.
UPDATE Aug 2021: The 7.2m masts have become way harder to find, and I’m no longer sure where to get the 9m ones. I most recently purchased a 7.2m one on AliExpress for around $20. I’ll update this article again once I have more info.
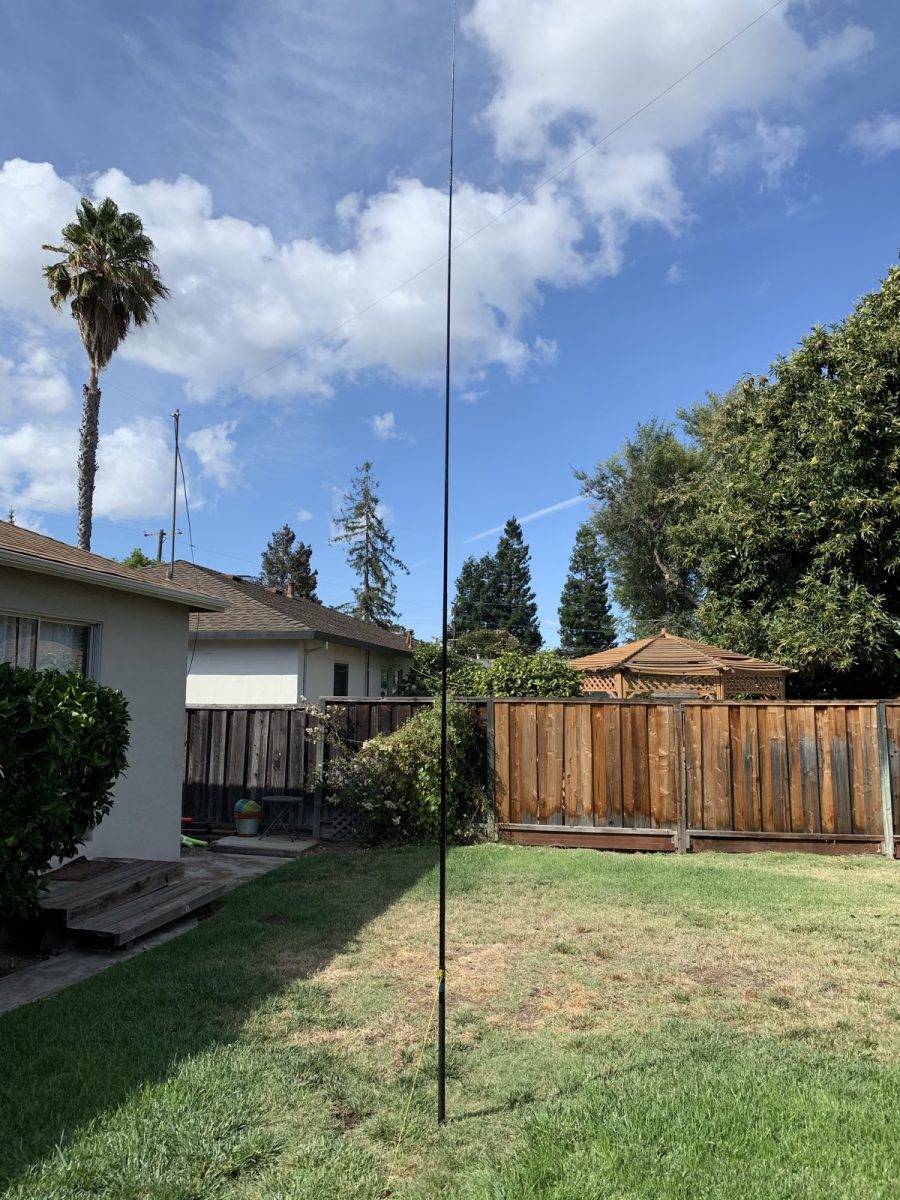
The longer mast is great, but the additional height really isn’t necessary, so I’ll probably bring the pole when I’m doing shorter SOTA operations. The primary pole I’ll keep using is the “7.2m” pole. The deployed length of this one, by the way, is about 16.5 feet or 5 meters.
Improvements
Over time I’ve played around with different ways I can use the pole, resulting in a few improvements. A few of these things:
- High density foam padding in the bottom and top, to dampen the slamming of the pole elements while hiking/running
- A little bit of electrical tape to make the top cap fit more snugly (thanks, Vic AB6SO for that idea)
- Take the top section of the pole out — it’s too skinny/flexible to use effectively (at least with the way I use it)
- Attach antenna wire with a small piece of flexible plastic — three holes: one for the antenna wire in the middle, two to slide over the top section of the mast
Even More Improvements
Up until recently, I’d either jammed the bare pole into some rocks, or guyed it with my “ice cream lid” guying ring. Then I got some really great ideas from Adam K6ARK. I’ll be writing more about his great ideas, since he’s a genius with making things for portable operations. Namely, an upcoming post on my tri-band EFHW (end-fed half-wave) trapped antenna, built on Adam’s and Fred KT5X’s (see Fred’s UltraLyte SOTA presentation) ideas.
These are the three improvements I got from Adam K6ARK. They may seem like simple things, but they make a world of difference in the use and durability of these masts:
- Heat shrink tubing covering at least two thirds of the bottom section — helps secure it in rocks and other places, while providing a lot of protection for the mast.
- A leash for the top cap — just a little piece of cord secured to the top cap so you don’t lose it!
- This is a big one: cord wrapped around the top of the bottom section, with three guy loops underneath, which is then epoxied in place. This allows for a built-in guying setup while adding barely any weight or bulk.
Here are some pictures of these most recent improvements:
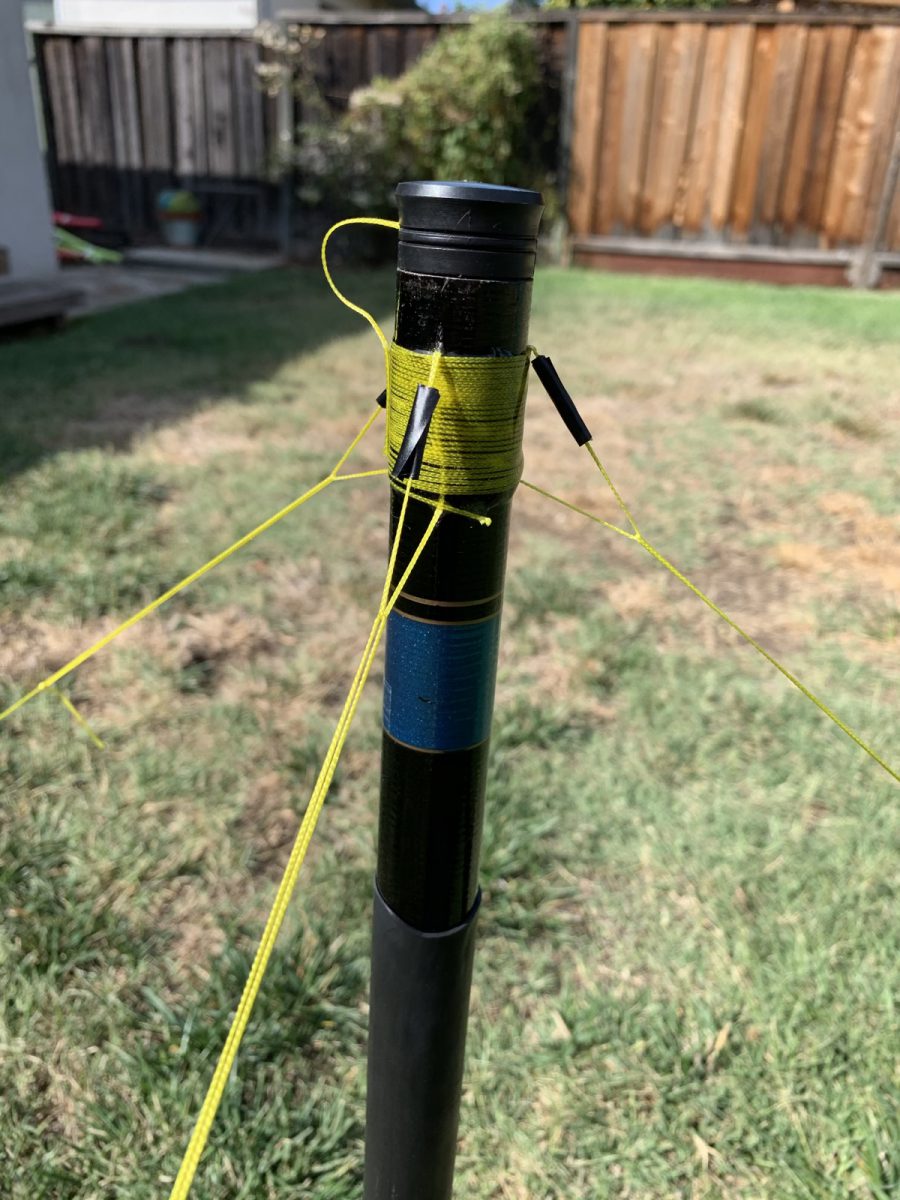
The process for adding the guying cordage is pretty simple:
- Cut cordage for three loops—your choice of cord. I used really thin stuff that may have durability issues down the road, but so far is holding up pretty well. You may want to go with something stronger.
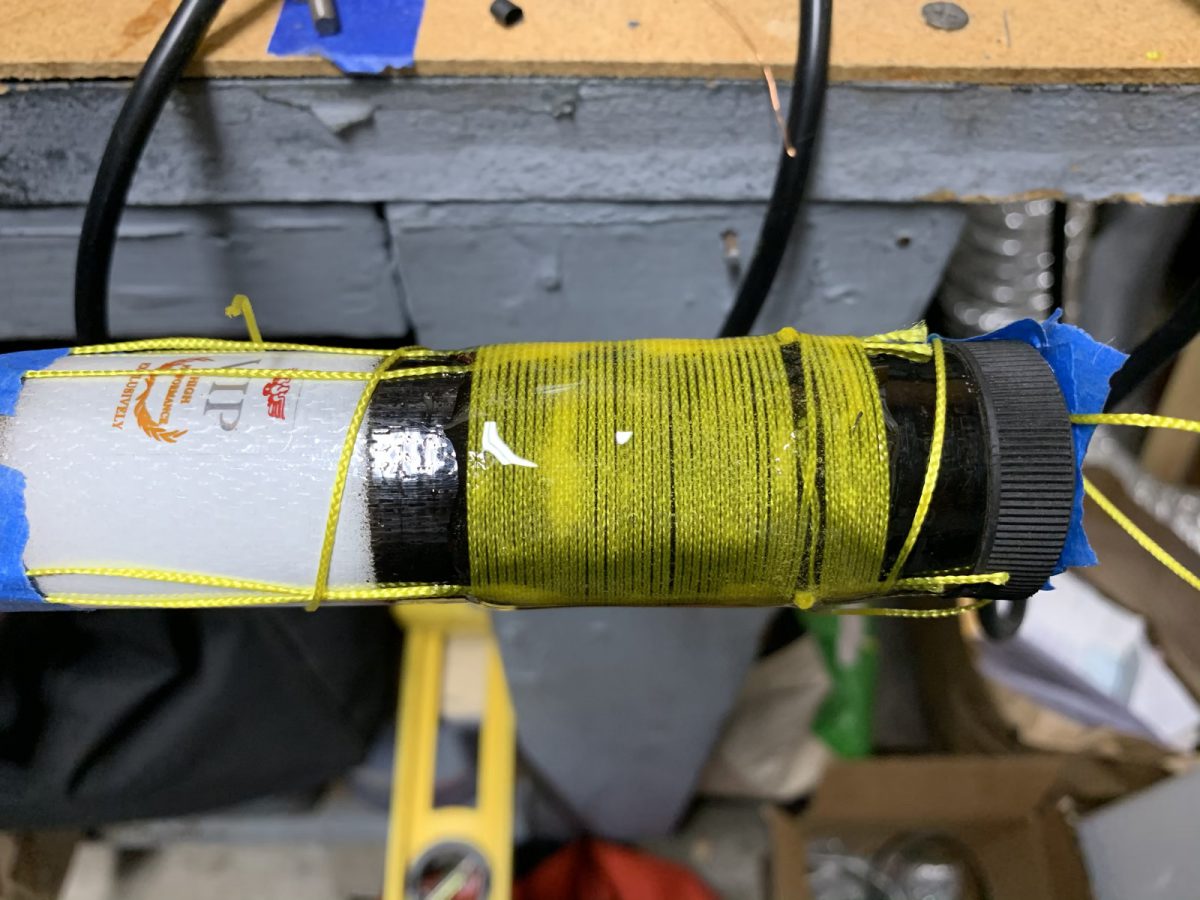
- Wrap cord around the pole enough times to cover at least 2 inches, putting the loop cordage under it. The first time I did this, I made it so I had to tie the loops together afterwards. Don’t do that—just put the ends of the loops under the wrap.
- Apply epoxy liberally. I used 30 minute epoxy to give myself some working time. Adam used 5 minute epoxy. Do what works for you. If you’re using 30min epoxy, you’ll need to keep spinning the pole for a little bit after application, so it doesn’t pool in one spot.
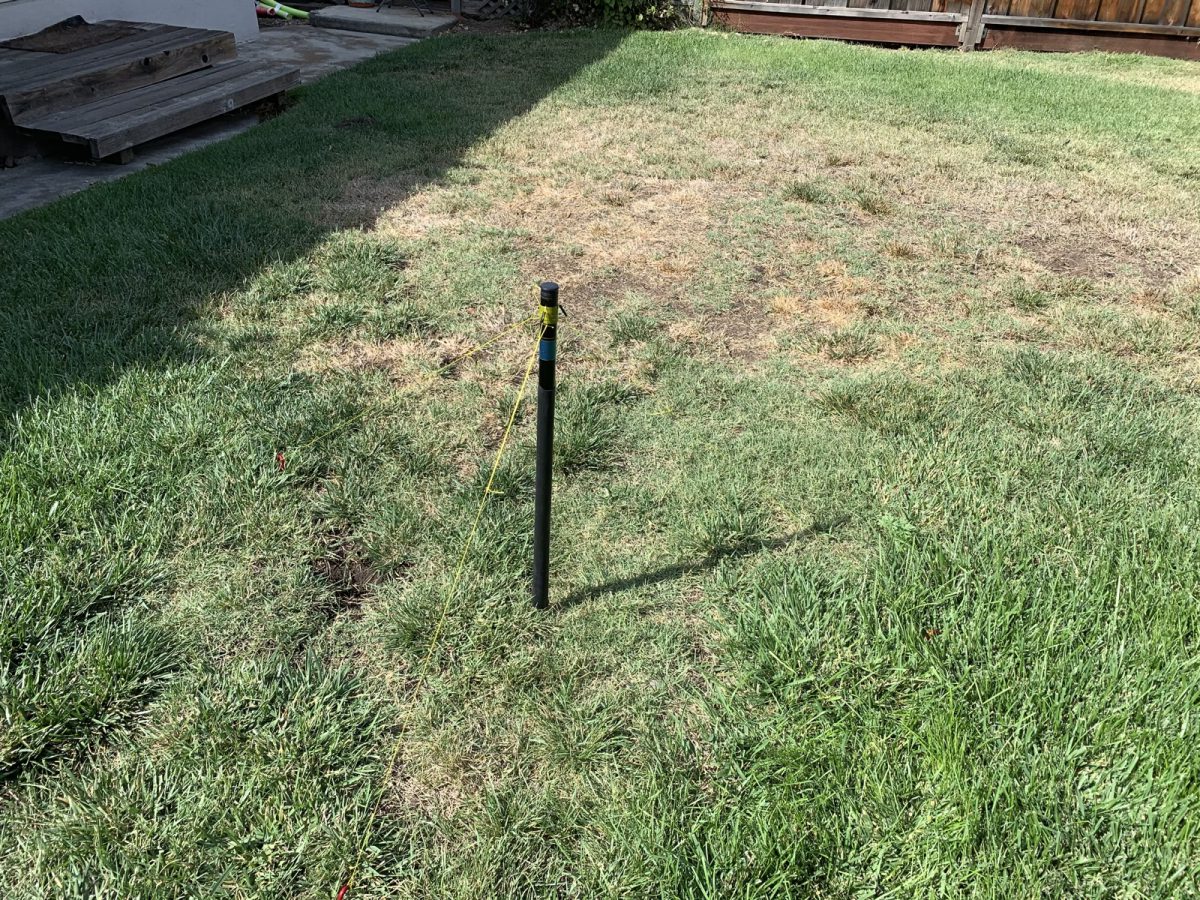
I’ve set this pole up a number of times, both with and without the guying setup. It’s a great setup! I can’t recommend these poles enough, and with these improvements they become an exceedingly excellent choice for SOTA and other portable operations.
Addendum – Notes from Fred KT5X
After sending this post out, Fred KT5X got in touch with me with the following notes. He’s got a lot of great ideas to share. Part of the challenge of ham radio is getting all of these great ideas into one place. Here you go:
- Don’t discard that all-too-skinny top section! Instead, use a little glue (of your choice) to fix it inside the next lower section thus stiffening that section
- LEAN the pole in the direction of the slant wire which should be down wind. Do this and the pole is unlikely to (ever) break.
- Just my opinion, I don’t put anything around the bottom section to protect it. It may get scratched, but so what. Pole won’t fail there. (Comment from Rex: the primary purpose of the heat shrink is to provide friction in rocks)
- For the top of the mast I fix a standard fishing pole “tip-top.” Very inexpensive, very simple, very clean. (I fix it to the top of the skinniest pole segment, put a drop of glue on it, and drop it all the way into the next section which is now being stiffened by the skinniest section within)
- For the cap of the collapsed pole, Have been doing as you, I drilled a hole in the center of the cap, put the thread through it, tied a tiny washer on the end so it can not pull back through the cap. I used to then wrap the thread around the pole as you, but more recently have more simply used electrical tape.
- I use either #26 or better, #28 teflon insulated wire. Larger wire is enough heavier to threaten to break the pole. The Teflon is very strong, the wire inside is very low resistance.
- I do not use an insulator on the end of the wire. It is just extra weight on the pole. I use 40 pound test braided fishing line (extremely light weight, essentially zero wind resistance) to support the wire and this is simply tied to the end of the wire. Fold the end of the wire over double, put the thread through the slot, wrap it around the insulated wire five or six times then back through the slot and pull it tight. Snip off excessive end of the wire.
- There are poles that are 15 or even 17 sections that collapse to just 18 inches, and they are still 6.3M long. It doesn’t stick up out of the pack to catch on overhanging tree branches. (Comment from Rex: I’ll see if Fred has a link to these)
- DON’T LET the vertical segment of the inverted-L wire twirl around the pole! The material has enough carbon in it to completely change the tuning of the antenna.
- If there are over-hanging tree limbs, use the pole to simply reach up and drape the wire over the limb, then drop the pole. Now the pole is supporting nothing. You can easily reach up 25 or more feet with the 18 foot pole. The Teflon insulation makes this work fine.
- For those who are handy… most pole failures happen at the top end of the flimsiest sections. Just like you see thread wrapped on fishing poles to secure guides to them, wrap about the top quarter inch of the top two flimsiest sections with nylon thread. Do this, and the pole can not possibly fail there.
- Since my first activation where I did try to guy my pole, I have never needed to or tried to again. I lean it against a tree limb, stuff it into a bush, wedge it in a rock crevice, or build a small stone cairn.
Thanks, Fred!